


����EECS 183 Project 4 ����python
�r(sh��)�g��2024-03-26 ��Դ�� ���ߣ� ��Ҫ�m�e(cu��)
EECS 183 Project 4: CoolPics | p4-coolpics
1/28
p4-coolpics
EECS 183 Project 4: CoolPics
Project Due Friday, March 22 2024, 11:59 pm
Direct autograder link
In this project, you will create a program that reads in a description of shapes, draws those
shapes, and saves the result to a file. You will represent the different shapes using classes. Here
are some examples of images created by students in past semesters:
EECS 183 Project 4: CoolPics | p4-coolpics
2/28
By completing this project, you will learn to:
Develop an application using multiple classes
Divide a C++ program into source and header files
Read program input from a file with multiple line formats
Write test cases for classes
Write member function stubs given their declarations
You will apply the following skills you learned in lecture:
Lecture 13
Use a streamʼs fail state to detect input format
Recover from a stream entering the fail state
Read and write to files using streams
Lecture 14
Write code using classes
Write and use default and non-default constructors
Lecture 15
Place class and member function declarations and definitions in the correct files
Access public and private portions of a class in the appropriate places
Write and use getter and setter functions
Define and use multiple non-default constructors
Lecture 16
Create and use classes that contain member variables that are instances of other classes
Lecture 17
EECS 183 Project 4: CoolPics | p4-coolpics
3/28
Overload operator« and operator» to allow classes to be read from and written to
streams
Write test cases for code structured with classes
Getting Started
Starter Files
Download the starter files using this link and create a project using them in your IDE.
You will be working with the following files:
File Role What you will do
pics.cpp Driver for application Write code here and submit
test.cpp Test cases Write code here and submit
Circle.cpp, Color.cpp,
Graphics.cpp, Line.cpp,
Point.cpp, Rectangle.cpp,
Triangle.cpp
Member function
definitions
Write code here and submit
Circle.h, Color.h, Graphics.h,
Line.h, Point.h, Rectangle.h,
Triangle.h
Class declarations Do not modify!
Shape.h, Shape.cpp
Provided support
code
Do not modify!
bmp.h, utility.h
Provided support
code
Do not modify!
.txt files
Input to generate
pictures
Use these as input for testing
pics.cpp
.bmp files Ouput from .txt files
Use these for testing the
output of pics.cpp
We suggest writing the code in the following order:
1. test.cpp (ongoing as you develop each class)
2. Point.cpp
EECS 183 Project 4: CoolPics | p4-coolpics
4/28
3. Color.cpp
4. Graphics.cpp
5. Line.cpp
6. Triangle.cpp
7. Circle.cpp
8. Rectangle.cpp
9. pics.cpp
Writing Function Stubs
The first time you try to run the starter code, you will see many compile errors. They will look
something like the following.
These errors are due to missing function definitions for most of the class member functions. In
previous projects in EECS 183, you were provided with all of the necessary functions for each
project. The shell of the function definitons were given and you had to finish implementing them.
For this project, you will be required to complete all of the shells of the function definitions. This
must be completed for all classes before you will be able to compile your code. Each function
declaration must have a corresponding function definition once any call to the function exists.
This is called a function stub. You must write all of the stubs for each function definition
immediately after creating your project in Visual Studio or Xcode.
A function stub for the Point class non-default constructor would look like the following, and
appear in the file Point.cpp
While a function stub for the Point class checkRange function would look like the following:
Rectangle.obj : error LNK2001: unresolved external symbol "public: __thiscall
Point::Point(int,int)" (??0Point@@QAE@HH@Z)
1
2
3
Point::Point(int xVal, int yVal) {
// to do - implement
}
1
2
3
4
5
6
int Point::checkRange(int val) {
// to do - implement
// to do - replace with correct return statement
return val;
}
EECS 183 Project 4: CoolPics | p4-coolpics
5/28
Submission and Grading
Submit your code to the autograder here. You receive 4 submits each day and your best overall
submission counts as your score. You will submit 11 files, which must be called Circle.cpp ,
Color.cpp , Graphics.cpp , Line.cpp , pics.cpp , Point.cpp , Rectange.cpp , Triangle.cpp ,
test.cpp , data1.txt , and data2.txt
The data1.txt and data2.txt files can contain any content you wish. They are to help you
write test cases for file I/O in test.cpp . You might use data1.txt with shapes you have added for
reading in your test.cpp, and data2.txt to test writing.
Correctness (60 points). To what extent does your code implement the features required by
our specification? To what extent is your code consistent with our specifications and free of
bugs?
Testing (10 points). Write a test suite in test.cpp that exposes bugs on the autograder.
Style (10 points). To what extent is your code written well? To what extent is your code
readable? Consult the project style rubric and the EECS 183 Style Guide for some tips!
If you submit by 11:59 PM on Wednesday, March 20, you will earn 5% extra credit on the
correctness portion of the project. If you submit by 11:59 PM on Thursday, March 21, you will earn
2.5% extra credit on the correctness portion of the project.
Working with a Partner
For Projects 3 and 4, you may choose to work with one other student who is currently
enrolled in EECS 183.
Although you are welcome to work alone if you wish, we encourage you to consider
partnering up for Project 4. If you would like a partner but donʼt know anyone in the class, we
encourage you to use the Search for Teammates post on Piazza if you want to find someone!
Please make sure to mark your search as Done once youʼve found a partner.
As a further reminder, a partnership is defined as two people. You are encouraged to help
each other and discuss the project in English (or in some other human language), but donʼt
share project code with anyone but your partner.
To register a partnership on the autograder, go to the autograder link for the project and
select “Send group invitation”. Then, add your partner to the group by entering their
email when prompted. They will receive a confirmation after registration, and must accept
the invitation before the partnership can submit. You must choose whether or not to
register for a group on the autograder before you can submit. If you select the option to
work alone, you will not be able to work with a partner later in the project. If a partnership
needs to be changed after you register, you may submit an admin request.
EECS 183 Project 4: CoolPics | p4-coolpics
6/28
The partnership will be treated as one student for the purpose of the autograder, and you will
not receive additional submits beyond the given ten submits per day.
If you decide to work with a partner, be sure to review the guidelines for working with a
partner. If you choose to use late days and you are working in a partnership, review the
document for how late days will be charged against each partner.
Collaboration Policy
We want students to learn from and with each other, and we encourage you to collaborate. We
also want to encourage you to reach out and get help when you need it. You are encouraged to:
Give or receive help in understanding course concepts covered in lecture or lab.
Practice and study with other students to prepare for assessments or exams.
Consult with other students to better understand project specifications.
Discuss general design principles or ideas as they relate to projects.
Help others understand compiler errors or how to debug parts of their code.
To clarify the last item, you are permitted to look at another studentʼs code to help them
understand what is going on with their code. You are not allowed to tell them what to write for
their code, and you are not allowed to copy their work to use in your own solution. If you are at all
unsure whether your collaboration is allowed, please contact the course staff via the admin form
before you do anything. We will help you determine if what youʼre thinking of doing is in the spirit
of collaboration for EECS 183.
The following are considered Honor Code violations:
Submitting othersʼ work as your own.
Copying or deriving portions of your code from othersʼ solutions.
Collaborating to write your code so that your solutions are identifiably similar.
Sharing your code with others to use as a resource when writing their code.
Receiving help from others to write your code.
Sharing test cases with others if they are turned in as part of your solution.
Sharing your code in any way, including making it publicly available in any form (e.g. a public
GitHub repository or personal website).
The full collaboration policy can be found in the syllabus.
Suggested Timeline
EECS 183 Project 4: CoolPics | p4-coolpics
7/28
For this project, you will be implementing a variety of classes. You will be approximately on
schedule if by each date you have written tests for, implemented, and submitted to the autograder
each specified class.
Wed, March 13: Written all function stubs and can compile your project locally.
Fri, March 15: Point.cpp
Sat, March 16: Color.cpp , Graphics.cpp
Sun, March 17: Line.cpp , Triangle.cpp
Mon, March 18: Circle.cpp , Rectangle.cpp , and you have eaten plenty of candy :)
Wed, March 20: pics.cpp and any final debugging. Make your final submission today for 5%
extra credit!
Fri, March 22: Project is due. Make your final submission to the autograder today before 11:59
PM.
Solution Overview
Your task in this project will be to write a program which can read in a .txt data file, process the
data, and create and write a .bmp file for the corresponding image.
In computer 2D graphics, it is common to represent an image in a coordinate system where the x
axis directed to the right, but the y axis is directed downward, so that the origin is in the top left
corner. And so if the image is of size 100 pixels × 100 pixels, the pixel at coordinate (0,0) would be
located in the top left corner, the pixel at coordinate (99,0) would be in the top right corner, the
pixel at coordinate (0,99) would be in the bottom left corner and the pixel at coordinate (99,99)
would be in the bottom right corner, as this graph demonstrates:
EECS 183 Project 4: CoolPics | p4-coolpics
8/28
Color
Color is often represented with three numbers in computing. Red, green, and blue are the primary
colors that are mixed to display the color of a pixel on a computer monitor. Nearly every color of
emitted light that a human can see can be created by combining these three colors in varying
levels. And so we can represent colors by specifying the amount of red, green and blue we want.
If we use 8 bits to represent each of the three colors in a pixel, there are 2 = 256 possible values
for a color. And so the intensity of red, green and blue ranges from 0 to 255, 0 meaning “no color”
and 255 meaning “lots of that color”. Thus was developed the RGB representation of color: first
the intensity of red is given, followed by the intensity of green and the intensity of blue. If you
wanted to represent the color red, the value of red would be 255, the value of green would be 0
and the value of blue would be 0 and youʼd have an RGB triple (255, 0, 0). The table below
illustrates how red and some other colors are represented in the RGB model:
Color Red value Green value Blue value
Red 255 0 0
Yellow 255 255 0
Green 0 255 0
Aqua 0 255 255
Blue 0 0 255
Magenta 255 0 255
White 255 255 255
Black 0 0 0
Incidentally, this same representation is used for the colors in HTML and CSS on the web. If
interested, take a look at http://en.wikipedia.org/wiki/Web_colors for more details.
Graphics class
The Graphics class holds a representation of pixels in an image and provides some functions that
can be used to do things such as setting an individual pixel or writing an entire image to a file. One
of your tasks is to finish implementing these functions.
Notice that the pixel information is stored in pixelData , a two-dimensional array (100 × 100) of
objects of class Color . This array thus defines “intensity values” of red, green and blue for each
of the pixels in the image of size 100 pixels × 100 pixels. Recall that valid x and y coordinates
8
EECS 183 Project 4: CoolPics | p4-coolpics
9/28
range from 0 to 99 and allow the image below be an illustration of how you could access pixels in
each of the four corners of the image.
Shape classes
There are multiple classes that represent shapes. Each of these classes contains a draw member
function that is used to draw that shape in a Graphics instance.
Your application will create instances of these classes based on instructions in the input .txt file.
Point
A point is a representation of a single coordinate on the image. In the input .txt file, it starts with a
left parenthesis and is followed by an x coordinate, a y coordinate and then by a right parenthesis,
for example, (1,2) .
Points in CoolPics are not used to define a single pixel of color, instead they are used to define the
coordinates of other shapes that can be seen, including Line, Triangle, Rectangle, and Circle.
Line
The input .txt file asks for a line using the following format: the input line will start with an L and
be followed by the start point, the end point, and the color.
The line will go between the start point to the end point and will be of ‘colorʼ
Triangle
1
2
L (10,10) (90,20) 255 150 0
L (x1,y1) (x2,y2) r g b
EECS 183 Project 4: CoolPics | p4-coolpics
10/28
A triangle starts with a T which is followed by the three points of the triangle. Following the
points, there is a color for the Triangle.
Triangle also has a second form where a color is defined for each vertex. In this form, triangle
starts with a T and is followed by a point, color, point, color, point, color.
The three points determine the vertices of the triangle. The fill is a gradation of the three colors of
the points (meaning that it will blend between the three colors based on the distance from each).
To achieve two different forms of triangle input, we recommend creating two different
constructors for the Triangle class.
Circle
A circle starts with a C , followed by a center point, radius, color.
Rectangle
A rectangle starts with an R and is followed by a start point (top-left), end point (bottom-right)
and color.
The two points will be opposite top-left and bottom-right vertices of the rectangle and will fill
between them with the specified color.
As with the Triangle class above, the Rectangle class must also be able to interpret a second form
of input where four colors are specified (one in each corner), and the color is blended. In this
specification, the first color corresponds to the top left corner of the Rectangle, and the other
three colors are specified in clockwise order. Note that this is different from the way that blended
Triangles are defined.
1
2
T (15,50) (15,90) (40,80) 0 140 20
T (x1,y1) (x2,y2) (x3,y3) r g b
1
2
T (90,60) 0 0 255 (90,90) 0 255 0 (40, 80) 255 0 0
T (x1,y1) r1 g1 b1 (x2,y2) r2 g2 b2 (x3, y3) r3 g3 b3
1
2
C (50,50) 25 235 230 0
C center radius r g b
1
2
R (20,20) (40,40) 80 30 200
R start end r g b
1
2
R (45,20) (85,49) 220 5 5 180 51 255 180 15 255 220 5 5
R start end top-lt rgb top-rt rgb bottom-rt rgb bottom-lt rgb
EECS 183 Project 4: CoolPics | p4-coolpics
11/28
Sample Input
Hereʼs an example of what an input file might look like:
It would ultimately produce this image:
operator» and operator«
In the distribution header files ( Line.h , Color.h , Circle.h , etc.) you will notice a couple of
lines of code very similar to the ones shown below, which are taken from Line.cpp .
These are special function declarations that are used to “overload” the functionality of the <<
and >> operators so that you can read and write class instances to and from streams.
Here are a few notes on how to interpret the first declaration:
1. The function returns a object of type istream (the & means that you are actually returning
a reference to an istream ).
2. operator>> is the name of the function. However, this function name is special because it
tells C++ that you want this function to be called whenever a developer uses the >> operator
like cin >> x; .
3. Notice that, when you use the >> operator, there are two operands involved (e. g., cin and
x in the previous sample statement). The two declared function parameters (the first of type
istream and the second of type Line ) let C++ know that these are the left and right
operands to be used, respectively, when calling >> .
1
2
3
4
5
6
L (10,10) (90,20) 255 150 0
T (15,50) (15,90) (40,80) 0 140 20
T (90,60) 0 0 255 (90,90) 0 255 0 (40,80) 255 0 0
C (50,50) 25 235 230 0
R (20,20) (40,40) 80 30 200
R (45,20) (85,49) 220 5 5 180 51 255 180 15 255 220 5 5
1
2
istream& operator>> (istream& ins, Line& line);
ostream& operator<< (ostream& outs, Line line);
EECS 183 Project 4: CoolPics | p4-coolpics
12/28
4. The implementation of these functions looks like the following. More details will be covered in
lecture:
Setting up File I/O
File Locations
Xcode
Follow along with Emma to set up your Xcode project the right way.
1. Condensed walkthrough to set up your Xcode project.
Xcode P4 CoolPics setup - condensed version Xcode P4 CoolPics setup - condensed version
1. Full, detailed instructions and troubleshooting guide to set up your Xcode project.
1
2
3
4
istream& operator>> (istream& ins, Line& line) {
line.read(ins);
return ins;
}
EECS 183 Project 4: CoolPics | p4-coolpics
13/28
Xcode P4 CoolPics setup - full walkthrough Xcode P4 CoolPics setup - full walkthrough
There are a few things that must be done for Xcode. First, ensure that Derived Data is stored
relative to your project folder. Select Xcode > Preferences in the menu bar, click on Locations
icon at the top on the window and choose Relative next to Derived Data. This will ensure that
executables are saved in your Project folder.
Then, tell Xcode to look for files in the folder where all other project files are stored. From the
menu bar, choose Product > Scheme > Edit Scheme.
EECS 183 Project 4: CoolPics | p4-coolpics
14/28
Select Run on the left, Options on top and then select the checkbox Use custom working
directory and navigate to your Project folder where you will store input files.
Now you can place input txt files right with your .h and .cpp files. Youʼll find bmp files
created by your program in the same place.
If you move your project folder, youʼll have to reset the projectʼs working directory.
EECS 183 Project 4: CoolPics | p4-coolpics
15/28
Visual Studio
Following the instructions for Setting Up Project 1 in the Getting Started with Visual Studio
document will put the starter files in the correct folder. The only difference from Project 1 is that
there are more starter files to add. These steps are replicated for project 4 in the video below.
Visual Studio project creation for Project 4 CoolPics Visual Studio project creation for Project 4 CoolPics
Verifying File IO and Project Setup
It is imperative that your Xcode/Visual studio project is set up correctly to read and write text files.
Be sure to edit the scheme for Xcode and that the files are in the correct directory in Visual
Studio.
Here is a test case that you can add to your test.cpp to check if your text files, like data1.txt
and data2.txt , are in the correct directory. Be sure to call file_check in your start_tests
function!
1
2
3
4
5
6
7
8
9
10
11
12
13
void file_check() {
// open one of the text files that are part of the starter code
ifstream ins;
ins.open("data1.txt");
// if the file was not in the correct directory, the stream state is fail
if (ins.fail()) {
cout << "Could not open data1.txt" << endl;
}
else {
cout << "Success! Text files are in the right directory." << endl;
}
EECS 183 Project 4: CoolPics | p4-coolpics
16/28
If you get the message "Could not open data1.txt" try editing the scheme again (Mac) or
checking that you have the project files in the correct directory (Windows).
If you cannot get the text files in the correct directory, then try adding the following to your
file_check test.
Then open Windows Explorer (Windows) or Finder (Mac) and search for the file named
crazyfilename . Once you find the folder with that file name, copy all of the .txt files from the
project starter files to that directory. Then try the file_check test again.
User Commands
The user will interact with CoolPics program using the following commands:
load filename
The program will append .txt to the filename, open the file, and load the representation of
the image into drawer.
write filename
The program will append .bmp to the filename, open the file and write the image stored in
drawer out to this file.
quit
This command will quit program after printing an ending message.
Commands from the menu should not be case sensitive (e.g., Load , load , lOAd , or LoaD
should all work the same way).
Sample Run
14
15
16
17
ins.close();
return;
}
1
2
3
4
5
// if the file is not in the right directory, try this:
ofstream outs;
outs.open("crazyfilename");
outs << "find the file named crazyfilename in windows explorer or finder";
outs.close();
EECS 183 Project 4: CoolPics | p4-coolpics
17/28
Here is an example of the way your program output should look, wherein red text represents a
userʼs input.
1
2
3
4
5
6
7
8
9
10
11
12
13
14
15
16
17
18
19
20
21
22
23
24
25
26
27
28
29
30
31
32
33
34
35
36
37
38
39
-------------------------------
EECS 183 Project 4 Menu Options
-------------------------------
1) Execute testing functions in test.cpp
2) Execute coolPics() function to make pics
Choice --> 2
=================================================
Welcome to CoolPics
=================================================
Command: Description:
-------- ------------
load filename Loads data from a txt file
write filename Creates a bmp image from data
quit Quits the program
load snowman
[Loaded snowman.txt]
Command: Description:
------- ------------
load filename Loads data from a txt file
write filename Creates a bmp image from data
quit Quits the program
write snowman
[Wrote snowman.bmp]
Command: Description:
------- ------------
load filename Loads data from a txt file
write filename Creates a bmp image from data
quit Quits the program
quit
=================================================
Thanks for using CoolPics!
=================================================
EECS 183 Project 4: CoolPics | p4-coolpics
18/28
Testing
Classes
When it comes to a class, getting it to compile is only the beginning. There are many errors that
do not show up at all until you call the different member functions. Therefore, in your testing,
make sure you call every constructor and every member function. The code we provide in
test.cpp gives an example of this for the Point class.
Similarity of Images
One way to test your program is to view the results by opening the BMP image and visually
analyzing it. But because files are essentially sequences of bits, diff programs will work too
(though not the online ones).
Visually
One of the easiest way to check the similarity or difference of two images is visually, by double clicking. This can be done in most image manipulation tools (e.g., Preview, Photoshop, GIMP). For
a demo of how to compare two images visually in GIMP, take a peak at
http://www.youtube.com/watch?v=KLjdCJ9t4VU.
Mac
When you installed Xcode on your computer, it came with a program called FileMerge. You can
open it by right-clicking on Xcode icon in the Dock and selecting Open Developer Tool >
FileMerge from the top menu bar. Drag and drop two files into Left and Right fields and click
Compare. Youʼll most likely see a message saying “Files are not ascii.” Click Proceed anyway. If
files are identical, youʼll see status: 0 differences at the bottom of FileMerge window.
Windows
If you are using Windows, open the Run command, either by selecting it from the Start menu or by
pressing Windows + R. Start typing cmd /k FC /b . Now you need to provide it with two paths for
the two files you want to compare. You can either type the file paths by hand, or just drag the two
files and drop them in the text box.
EECS 183 Project 4: CoolPics | p4-coolpics
19/28
Press OK to start comparing two files. If the files are identical, youʼll see a windows similar to this
one.
If instead the files are different, youʼll see something like this:
EECS 183 Project 4: CoolPics | p4-coolpics
20/28
Bugs To Expose
For your test.cpp , there are a total of 26 unique bugs to find in our implementations. Your tests
do not need to expose all of the bugs to receive full points for the lab. The autograder will tell you
the names of the bugs that you have exposed, from the following set:
POINT_NON_DEFAULT_CONSTRUCTOR
POINT_SETTERS_1
POINT_SETTERS_2
POINT_GET_X
LINE_CONSTRUCTOR
LINE_SET_END
LINE_GET_START
LINE_WRITE
COLOR_CONSTRUCTOR
COLOR_SET_BLUE
COLOR_GET_BLUE
COLOR_GET_GREEN
COLOR_CHECK_RANGE
TRIANGLE_CONSTRUCTORS
TRIANGLE_SET_VERTEX
TRIANGLE_GET_VERTEX
EECS 183 Project 4: CoolPics | p4-coolpics
21/28
TRIANGLE_GET_VERTEX_COLOR
TRIANGLE_WRITE
CIRCLE_CONSTRUCTORS
CIRCLE_SET_RADIUS
CIRCLE_SET_CENTER
RECTANGLE_CONSTRUCTORS_1
RECTANGLE_CONSTRUCTORS_2
RECTANGLE_SET_COLOR
RECTANGLE_GET_END
RECTANGLE_SET_START
Extra Credit
Maximum of 5 points!
This is an opportunity to earn extra credit for interesting, artistic, or fun inmages . Submit a file
called ec.txt to generate a BMP image. You must use at least 3 different shapes and adhere to
the spirit of the extra credit.
The teaching staff will do the judging. The file must be submitted to
https://autograder.io/web/project/2403 by Friday, March 22 2024, 11:59 pm Eastern.
This txt file must be named ec.txt . Note that the name is all lowercase (“ec” is short for
“extra credit”).
When you create your own input txt files, remember that the origin (0,0) is in the upper
left-hand corner and that the image will ultimately be 100 by 100 pixels.
Extra credit must be done individually; you may not work with a partner on your extra credit
file.
For the 5 points extra credit, the image that is generated must be outstanding. Less
outstanding will receive less points. If the generated image is one of the distribution images, it
will receive 0 points.
Style
Your code must follow the EECS 183 style guide.
EECS 183 Project 4: CoolPics | p4-coolpics
22/28
Style Rubric
Top Comment
Must have name, uniqname, program name, and project description at the top of each file.
If all or part of the top comment is missing, take 1 point off.
Readability violations
-1 for each of the following:
Indentations
Not using a consistent number of spaces for each level of code indentation
This includes using tabs on some lines and spaces on others
Not indenting lines at all
Failing to indent the blocks of code inside curly braces
Spacing
Not putting a space around operators (e.g., 5*7 instead of 5 * 7 or count=0; instead of
count = 0; )
Includes stream insertion ( << ) and extraction ( >> ) operators
Not putting a space between if, while, or for and the condition to be evaluated
Putting a space between a function name and the opening parenthesis
Bracing
Using a mix of Egyptian-style and hanging braces
Egyptian-style: ‘{‘ at the end of a statement
Hanging: ‘{‘ on its own line
Braces should always be used for conditionals, loops, and functions
Examples:
1 // good
EECS 183 Project 4: CoolPics | p4-coolpics
23/28
Variables
Variable names not meaningful
Inconsistent variable naming style ( camelCase vs. snake_case )
Excluding const variables, which are always SNAKE_CASE
Not declaring const variables as const
Not using all uppercase SNAKE_CASE for const variable names
Using variable types that do not make sense in context
Line limit
Going over 80 characters on a line
Includes lines of comments and lines of code
Statements
More than one statement on a single line
A statement ends in a semicolon
Do not count off for multiple statements as part of a for loop declaration
Comments
Commenting on the end of a line of code
2
3
4
5
6
7
8
9
10
11
12
13
if (x == 1) {
return false;
}
if (x == 2)
{
return true;
}
// bad
if (x == 1) return false;
if (x == 2)
return true;
1 // A comment should be placed before a line of code
EECS 183 Project 4: CoolPics | p4-coolpics
24/28
Insufficient comments or excessive comments
Code should be thoroughly commented such that linesʼ functionality is apparent from
comments alone or from quickly glancing at code
Example of appropriate comment:
Example of excessive comments:
Unneeded comments left in the code:
Commented out code:
RMEs
Missing RMEs for any of the defined functions, except for main. This includes functions from
the distribution code and any functions created by the student
Having RMEs outside of header files
Coding quality
-2 for each of the following:
Global variables
Global variables not declared as const
Magic numbers
2 int count = 0; // not on the same line as the code
1
2
// convert cups of flour to bags of flour
int bagFlour = ceil((CUPS_FLOUR * numBatches) / CUPS_IN_LB_FLOUR);
1
2
// declare variable
int bagFlour;
1
2
3
4
// your code goes here
// TODO: implement
// this function doesn't work
// FIXED
1
2
// int numBatches = people / 12;
int numBatches = ceil(people / NUM_IN_BATCH);
EECS 183 Project 4: CoolPics | p4-coolpics
25/28
Using 100 instead of DIMENSION
0, 1, and 255 are OK
Egregious code
Having redundant statements for RED and BLUE instead of using opposite_color()
Logic that is clearly too involved or incorrect
e.g. instead of basing numbers on conversions, writing:
and so on
Function misuse
Not calling helper functions where appropriate
Reimplementing reads and writes, instead of calling read and write method functions or
using overloaded insertion and extraction operators
Reimplementing initArray instead of calling it where appropriate
bools
Only deduct 1 point for this category
Writing <bool> == true , <bool> != true , <bool> == false , or <bool> != false
Same for comparing bools to 0 and 1
Returning 0 and 1 instead of true and false for a bool functions
Optional Appendix: BMP Image Format
If youʼve ever taken a digital photograph, then youʼve seen a JPEG image. If youʼve ever taken a
screenshot on your Mac, then youʼve seen a PNG file. If youʼve ever seen a moving image on a
webpage, then youʼve seen a GIF. If youʼve ever looked at Windows XPʼs default wallpaper, then
youʼve seen a BMP. JPEG, PNG, GIF and BMP are all different file formats that store graphical
1
2
3
4
5
if (year >= 1700 && year < 1800) {
century = 17;
} else if (year >= 1800 && year < 1900) {
century = 18;
}
EECS 183 Project 4: CoolPics | p4-coolpics
26/28
images. In this project, you will write a program that produces BMP images. Though the code to
write BMP files is already written for you, itʼs still useful to know something about how BMP files
are formatted.
Perhaps the simplest way to represent an image is with a grid of pixels. A pixel is just a dot, a
single picture element. For instance, a black and white image can be represented with a two-color
grid of bits: a 0 would mean that the pixel is off (white) and a 1 would meant that the pixel is on
(black).
(Image adapted from http://www.brackeen.com/vga/bitmaps.html)
In this sense, an image is just a map of bits. For a larger image, you would simply need a larger
grid, and for a more colorful image, youʼd need more bits per pixel, in order to store more
information. Many file formats support “24-bit color,” which means they represent a pixel with 24
bits (24 zeroes and ones).
A 24-bit BMP uses 8 of those bits to signify the amount of red in a pixelʼs color, 8 bits to signify
the amount of green in a pixelʼs color and 8 bits to signify the amount of blue in a pixelʼs color.
Thus was developed the RGB representation of color. Incidentally, this same representation is
used for the colors in HTML and CSS on the web. If interested, take a look at
http://en.wikipedia.org/wiki/Web_colors for more details.
Since each color (red, green, blue) in a pixel is represented by 8 bits, there are 2 = 256 possible
values for that color, ranging from 0 to 255. A value of 0 for a color would imply “no color”, while
the value of 255 would imply “a lot of that color.”” So if you wanted to represent a pixel that is
purely blue, it would have a value of 0 for red, a value of 0 for green and a value of 255 for blue.
On the web—and in the rest of this discussion—instead of representing this with the decimal
numbers 0-255, we use the equivalent hexadecimal numbers 00-FF, and colors can be defined
with a 24-bit triplet of these hexadecimal values (e.g., ff0000 is red ffffff is white and
8
EECS 183 Project 4: CoolPics | p4-coolpics
27/28
0000ff is blue). The above link, http://en.wikipedia.org/wiki/Web_colors, has an extensive
explanation of using hex (i.e., hexadecimal) for color description.
Since a file is just a sequence of bits, we can create an image file by sequentially placing each 24
bits that represent colors in a pixel. This is (almost) how a BMP (bitmap) file is structured. First, it
contains some “metadata”, general information about the file, such as the format, width, and
height of the image. This metadata is stored in the beginning of the file in the form of two data
structures known as “headers” (not to be confused with C++ header files). Donʼt worry about
what exactly should go in the headers (besides the imageʼs width and height); the staff has taken
care of writing them to a file.
Immediately following the headers comes the representation of the image in a bitmap (i.e., a
collection of pixels). Each pixel is stored as a triple (1 byte for each of red, green and blue values).
However, BMP stores these triples backwards (i.e., as BGR), with 8 bits for blue, followed by 8 bits
for green, followed by 8 bits for red. And so if we converted the above black and white smiley to
red, each white pixel would be represented by the triple (255,255,255), or ffffff in
hexadecimal, and each red pixel would be represented by (0,0,255), or similarly 0000ff in
hexadecimal. And we get
Now, a word on padding. It turns out that 24-bit BMPs are stored a bit differently if the number of
pixels in each row is not a multiple of 4. m.bmp , for instance, is 11 pixels wide by 8 pixels tall.
1
2
3
4
5
6
7
8
ffffff ffffff 0000ff 0000ff 0000ff 0000ff ffffff ffffff
ffffff 0000ff ffffff ffffff ffffff ffffff 0000ff ffffff
0000ff ffffff 0000ff ffffff ffffff 0000ff ffffff 0000ff
0000ff ffffff ffffff ffffff ffffff ffffff ffffff 0000ff
0000ff ffffff 0000ff ffffff ffffff 0000ff ffffff 0000ff
0000ff ffffff ffffff 0000ff 0000ff ffffff ffffff 0000ff
ffffff 0000ff ffffff ffffff ffffff ffffff 0000ff ffffff
ffffff ffffff 0000ff 0000ff 0000ff 0000ff ffffff ffffff
EECS 183 Project 4: CoolPics | p4-coolpics
28/28
The colors of the University of Michigan are Maize ( ffcb05 ) and Blue ( 00274c ). Each row in the
image is composed of 11 pixels. And so the row is “padded” with zeroes to make up for the
difference. In this case, 3 bytes (24-bits) of zeros are needed ((12 pixels needed – 11 pixels) ✕ 3
bytes per pixel). And so each row requires 3 bytes of zero values (or one hexadecimal 000000
value) appended to its end, and we could represent the image as follows (remember that BMP
Ո(q��ng)��QQ��99515681 �]�䣺99515681@qq.com WX��codehelp
��(bi��o)����


��һ�����֙C(j��)���_��(d��ng)ǰ�(y��)
ע�����W(w��ng)�l�����ṩ�挍(sh��)������Ϣ�����D(zhu��n)�d�ă�(n��i)�ݣ�����(qu��n)����ԭ���ߺ��Y���ṩ�������У������κβ��m��Ո(q��ng)(li��n)ϵ�҂�������(hu��)��24С�r(sh��)��(n��i)�h����
�o���P(gu��n)��Ϣ ���������YӍ
�����D����Ϣ
|
|
|
|
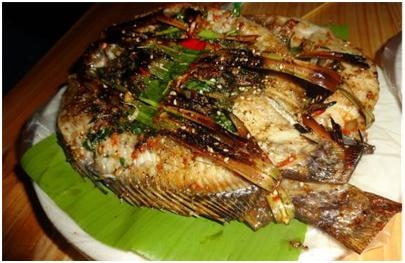
|
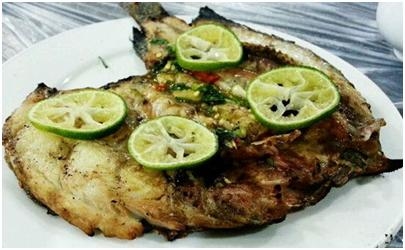
|

|

|
���]��Ϣ
���P(gu��n)����
�o���P(gu��n)��Ϣ
��Ŀ����